Navigating the Battlefield: A Comprehensive Guide to the Wild Rift Map
Related Articles: Navigating the Battlefield: A Comprehensive Guide to the Wild Rift Map
Introduction
With enthusiasm, let’s navigate through the intriguing topic related to Navigating the Battlefield: A Comprehensive Guide to the Wild Rift Map. Let’s weave interesting information and offer fresh perspectives to the readers.
Table of Content
Navigating the Battlefield: A Comprehensive Guide to the Wild Rift Map
The Wild Rift map, a meticulously crafted battleground, is a cornerstone of the mobile MOBA experience. It serves as the stage for strategic battles, intricate team fights, and exhilarating victories. Understanding its intricacies is crucial for mastering the game and achieving success. This article will delve into the map’s layout, key locations, strategic nuances, and its role in shaping the dynamic gameplay of Wild Rift.
The Map’s Layout: A Symphony of Lanes and Jungles
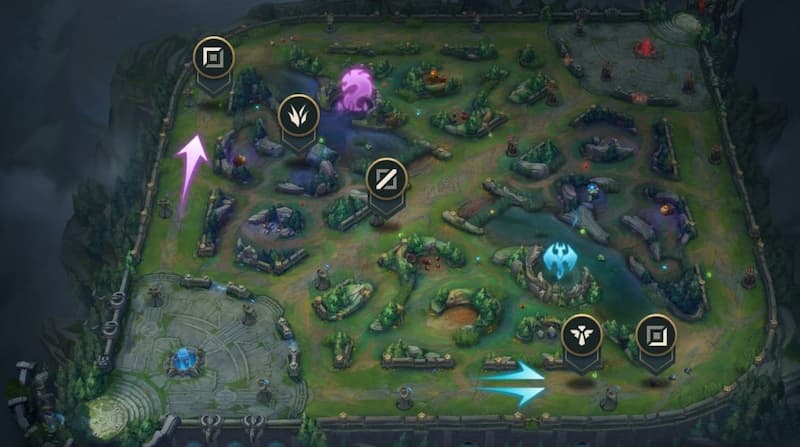
The Wild Rift map is a symmetrical landscape divided into three distinct lanes: Top Lane, Mid Lane, and Bot Lane. Each lane offers a unique path for champions to progress, with different advantages and disadvantages.
-
Top Lane: This lane is typically favored by champions with strong melee combat capabilities and sustain, as it is characterized by a more enclosed space, allowing for close-quarters engagements.
-
Mid Lane: This lane is often the heart of the action, attracting champions with high mobility and burst damage, due to its open layout and proximity to important objectives.
-
Bot Lane: This lane is typically dominated by ranged champions, particularly marksmen and support champions, who can leverage the lane’s open space to maximize their range and control.
Adjacent to these lanes are the Jungles, sprawling areas teeming with neutral monsters and strategically vital resources. These areas are often traversed by champions known as Junglers, who utilize the jungle’s resources to gain gold, experience, and powerful buffs.
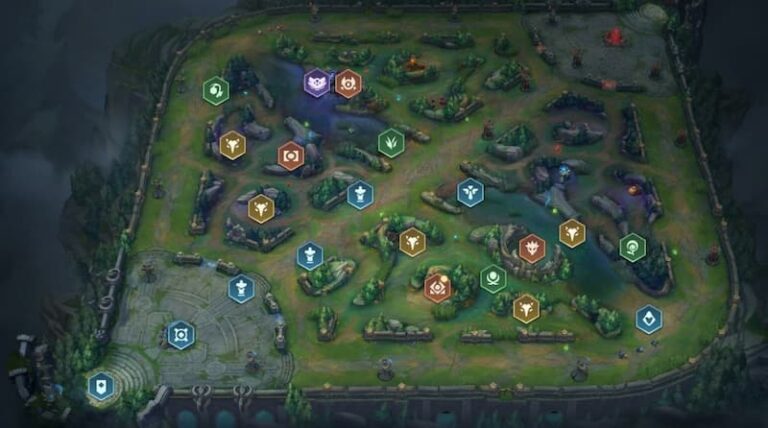
Key Locations: The Pillars of Strategy
The Wild Rift map is dotted with key locations that play a crucial role in shaping the flow of the game. These locations are the focal points of strategic planning and execution, offering significant advantages to the team that controls them.
-
Nexus: The ultimate objective of the game, the Nexus is a heavily fortified structure located at the heart of each team’s base. Destroying the enemy Nexus secures victory.
-
Towers: Defensive structures positioned strategically along the lanes, towers provide a layer of protection for the Nexus and hinder enemy advancement.
-
Inhibitors: Powerful structures located within the base, inhibitors are responsible for enabling the spawning of super minions, which can push lanes aggressively.
-
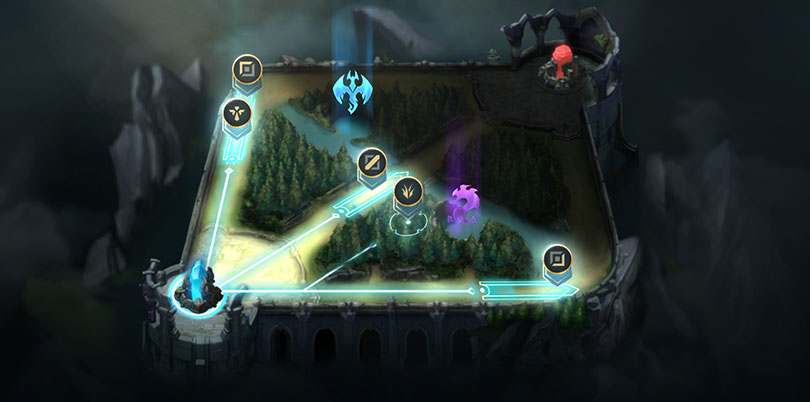
Dragon: A powerful neutral monster residing in the bottom jungle, Dragon grants buffs to the team that slays it, enhancing their team’s combat capabilities.
-
Baron Nashor: A formidable neutral monster residing in the top jungle, Baron Nashor grants a powerful buff to the team that slays it, significantly increasing their combat power and granting global presence.
-
Buffs: Scattered throughout the jungle, buffs offer temporary enhancements to champions, providing benefits like increased damage, movement speed, or health regeneration.
Strategic Nuances: The Art of Domination
The Wild Rift map’s layout and key locations create a complex web of strategic opportunities and challenges. Mastering these nuances is essential for achieving victory.
-
Lane Control: Establishing dominance in a lane by pushing the opposing team back and securing kills is a crucial aspect of the game. This allows for greater map pressure and control over objectives.
-
Jungle Control: Controlling the jungle by slaying neutral monsters and securing buffs grants valuable resources and allows for early game dominance.
-
Objective Control: Securing control of key objectives like Dragon and Baron Nashor provides significant advantages in terms of combat power and map pressure.
-
Team Fights: Engaging in coordinated team fights around key objectives is crucial for winning the game. These engagements require strategic positioning, champion synergy, and effective communication.
-
Vision Control: Placing wards strategically around the map provides crucial information about enemy movements and intentions, enabling informed decision-making and preventing ambushes.
The Importance of the Wild Rift Map
The Wild Rift map is not merely a backdrop for combat; it is a dynamic and interactive element that profoundly impacts the gameplay experience. It influences strategic decisions, dictates champion selection, and ultimately determines the outcome of the game.
-
Strategic Depth: The map’s intricate layout and key locations create a complex and strategic environment, requiring players to develop nuanced strategies and adapt to changing circumstances.
-
Champion Synergy: The map’s design encourages players to select champions with complementary abilities and roles, fostering team synergy and enabling effective team compositions.
-
Dynamic Gameplay: The map’s constant state of flux, influenced by objective control, lane pressure, and strategic decision-making, ensures a dynamic and engaging gameplay experience.
Frequently Asked Questions (FAQs)
Q: How do I choose the right lane for my champion?
A: The ideal lane for a champion depends on its role and playstyle. For example, melee champions with high sustain are well-suited for the Top Lane, while ranged champions with high burst damage are often favored in the Mid Lane.
Q: What are the best strategies for jungling?
A: Effective jungling strategies involve optimizing clear speed, securing buffs, and ganking lanes strategically to support your team.
Q: How do I use wards effectively?
A: Wards should be placed in strategic locations to provide vision control and prevent ambushes. Consider placing them near objectives, in high-traffic areas, and along potential enemy paths.
Q: What are the best strategies for team fights?
A: Successful team fights require coordinated positioning, champion synergy, and effective communication. Prioritize focusing down high-priority targets and maximizing damage output while minimizing losses.
Tips for Mastering the Wild Rift Map
-
Study the map thoroughly: Familiarize yourself with the layout, key locations, and strategic nuances of the Wild Rift map.
-
Experiment with different lanes and champions: Explore the map’s diverse options to discover which playstyle best suits your preferences.
-
Prioritize objective control: Secure control of Dragon, Baron Nashor, and other key objectives to gain a significant advantage.
-
Communicate effectively with your team: Share information about enemy movements, ward placements, and strategic plans to ensure coordinated action.
-
Adapt to changing circumstances: The map’s dynamic nature requires flexibility and adaptability. Be prepared to adjust your strategy based on the current state of the game.
Conclusion
The Wild Rift map is a multifaceted and dynamic element that elevates the mobile MOBA experience to new heights. Its intricate layout, strategic locations, and diverse gameplay opportunities encourage strategic thinking, team synergy, and a dynamic and engaging gameplay experience. By mastering the map’s nuances and utilizing its strategic opportunities effectively, players can unlock the full potential of Wild Rift and achieve victory on the battlefield.


Closure
Thus, we hope this article has provided valuable insights into Navigating the Battlefield: A Comprehensive Guide to the Wild Rift Map. We appreciate your attention to our article. See you in our next article!